Ionic 5 Firebase Email Auth
-
In this article i'm going to show you how to integrate firebase email login for ionic apps and pwa's. I'll cover all the basic stuff like login, register, forgot password, logout and profile.
First i will introduce about firebase and ionic 5.
What is Firebase
I'm sure you have heard about firebase before, if not don't worry i'll tell you about firebase. Firebase is a Backend-as-a-Service (BaaS) that started in 2011 and backed by google. The main advantage of using firebase is we don't want to have a server, firebase is the our server, it has rich feature set that can make fully functional dynamic mobile apps without our own API, Database etc… See below for main features of firebase -
- Analytics
- Realtime Database
- Push Notification
- Authentication
- Firestore
- and many more...
In this article we use firebase authentication feature. Firebase provides many sign-in methods.
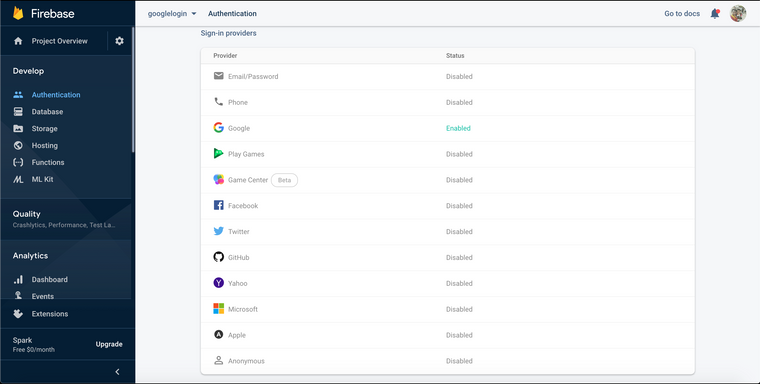
We use Email/Password sign-in method in this article. In next part i will talk about social logins like Google, Facebook.
What is ionic?
Ionic is a open source SDK for develop high performance hybrid mobile apps and progressive web apps(PWA). It uses HTML5, CSS, JS technologies to develop apps & pwa's, sounds good, no? With that web technologies you can made powerfull and look and feel beautifull apps for any platform or device.
Why you should choose hybrid technologies over native apps? because if you develop a native app, for Android you have to use Java and for iOS you have to use Objective C or Swift, you have to develop seperately for each platform. That is very expensive and take lot of time. In that hybrid technologies you can use same codebase for different platforms like Android, iOS, Windows also you can list them on native app stores.
Steps
- Create Firebase Project
- Create Ionic 5 app
- Connect Ionic app to Firebase
- Implementing Email/Password sign-in
- Implementing Forgot Password
Ok, let's start it.
Step 1 - Firebase Project
If you have used firebase before you can skip this step, for beginners follow below steps,
- Go to Firebase Console
- Sign in with your google account
- Firebase dashboard should look like this
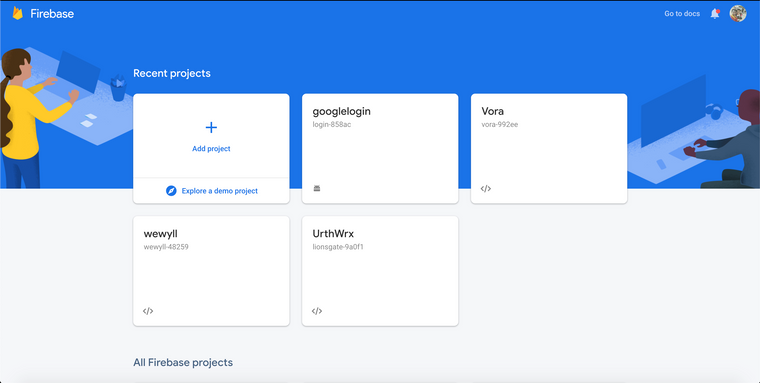
Then click on **Add Project
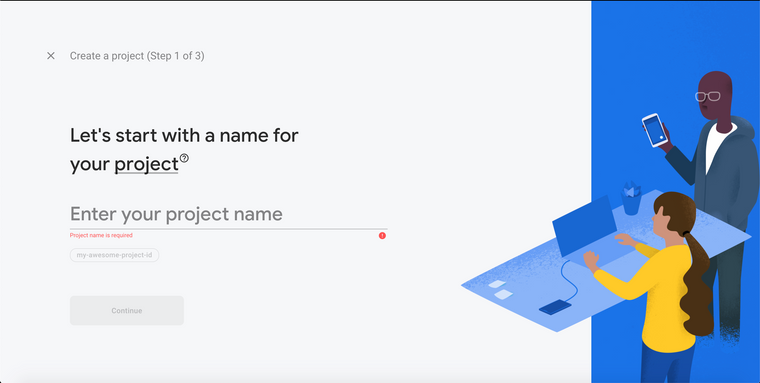
Enter name for the project and click Continue button, for this project i'm use authapp for project name
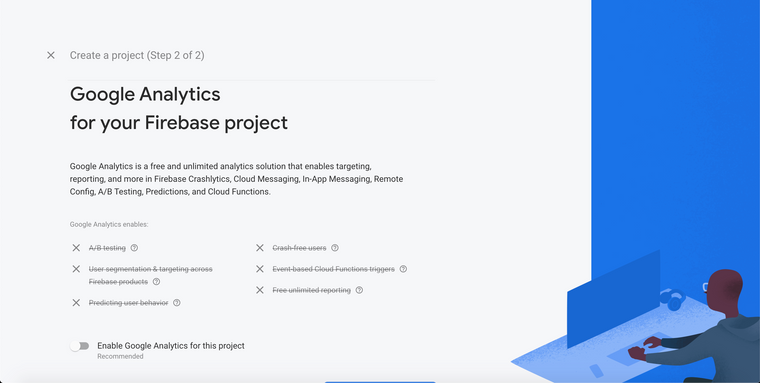
In next step, disable Enable Google Analytics for this project and click on Create Project button, now go inside the project, it look like this,
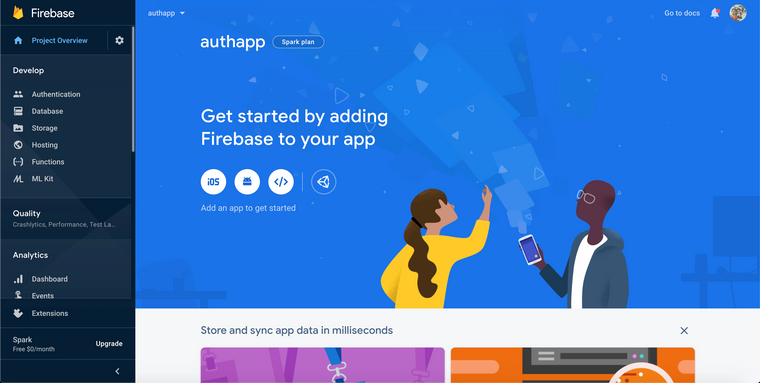
Now click on Authentication located on left side bar
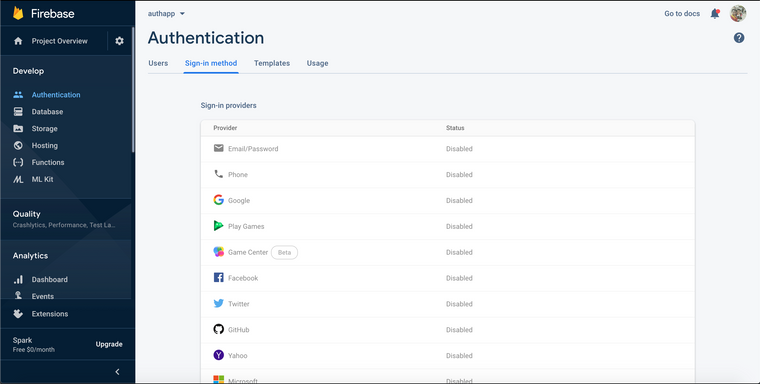
And click on Sign-in method tab on the top, then enable the Email/Password option
This step is done.
Step 2 - Create Ionic 5 app
To create ionic app, you have to install ionic-cli, nodejs, npm on your machine. If you havent setup those softwares, please follow this link before proceeding.
Let's create the project, open your terminal and cd to empty directory and enter the following command
ionic start auth-app blankThis will generate an blank starter ionic app on our directory, after project creation, run
ionic serveto run in on browser.Step 3 - Connect Ionic app to Firebase
First we need to generate firebase configuration for our app, to do this go to firebase console and follow the steps,
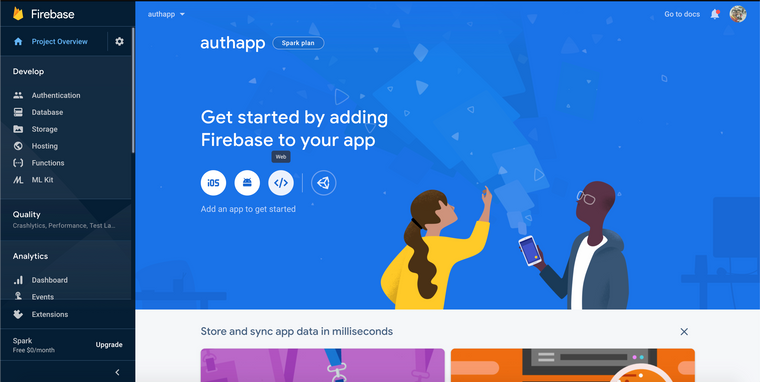
Click on </> icon on the dashboard,
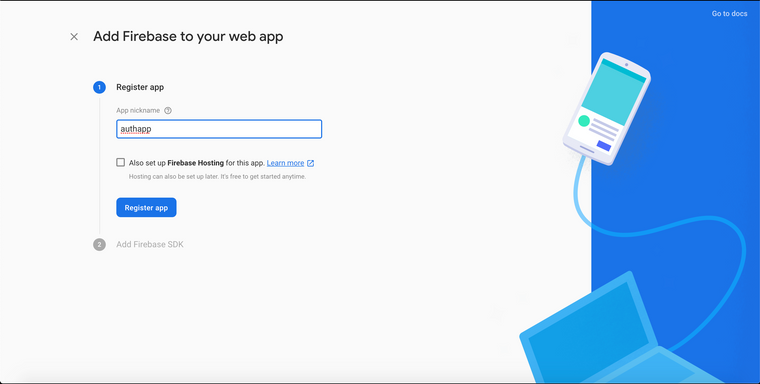
Give a nickname and click on Register app button
After copy the below configuration part from the firebase,
// Your web app's Firebase configuration
  var firebaseConfig = {
    apiKey: "AIzaSyDkq5rm-**************************",
    authDomain: "*****************************",
    databaseURL: "***********************************",
    projectId: "************",
    storageBucket: "************************",
    messagingSenderId: "***********",
    appId: "************************************"
  };
Now open
src/environments/environment.ts&src/environments/environment.prod.tsfile and past the configuration just copied,
To communicate with firebase and use firebase methods we use AngularFire2 package. Install package from npm
npm i firebase @angular/fireNow we have to import Angular Fire Module to our app module, open
src/app/app.module.ts,import { NgModule } from '@angular/core'; import { BrowserModule } from '@angular/platform-browser'; import { RouteReuseStrategy } from '@angular/router'; import { IonicModule, IonicRouteStrategy } from '@ionic/angular'; import { SplashScreen } from '@ionic-native/splash-screen/ngx'; import { StatusBar } from '@ionic-native/status-bar/ngx'; import { AppComponent } from './app.component'; import { AppRoutingModule } from './app-routing.module'; // Angular Fire Module import { AngularFireModule } from '@angular/fire'; import { AngularFireAuthModule } from '@angular/fire/auth'; import { environment } from '../environments/environment'; @NgModule({ declarations: [AppComponent], entryComponents: [], imports: [BrowserModule, IonicModule.forRoot(), AppRoutingModule, //Initializing Firebase App AngularFireModule.initializeApp(environment.firebaseConfig), AngularFireAuthModule ], providers: [ StatusBar, SplashScreen, { provide: RouteReuseStrategy, useClass: IonicRouteStrategy } ], bootstrap: [AppComponent] }) export class AppModule {}Now our app able to communicate with firebase app, so we can now proceed to implement Email/Password sign-in.
Step 4 - Implementing Email/Password sign-in
For this we need two pages, one for Login other for Register, lets create both pages using ionic cli, run below commands on root of the project,
ionic g page Loginionic g page RegisterNow open login.page.html page and put below code.
<ion-header>
  <ion-toolbar>
    <ion-buttons slot="start">
      <ion-back-button></ion-back-button>
    </ion-buttons>
    <ion-title>Login</ion-title>
  </ion-toolbar>
</ion-header>

<ion-content class="ion-padding">
  <ion-item>
    <ion-label position="floating">Email</ion-label>
    <ion-input [(ngModel)]="email"></ion-input>
  </ion-item>
  <ion-item>
    <ion-label position="floating">Password</ion-label>
    <ion-input [(ngModel)]="password"></ion-input>
  </ion-item>

  <ion-button expand="block" class="ion-margin-vertical" (click)="login()">LOGIN</ion-button>

  <div class="ion-text-center">
    Don't have an account? <span routerLink="/register" routerDirection="forward">Sign-up</span>
  </div>
</ion-content>
It will looks like this,
Now open register.page.html and put below code,
<ion-header>
  <ion-toolbar>
    <ion-buttons slot="start">
      <ion-back-button></ion-back-button>
    </ion-buttons>
    <ion-title>Register</ion-title>
  </ion-toolbar>
</ion-header>

<ion-content class="ion-padding">
  <ion-item>
    <ion-label position="floating">Email</ion-label>
    <ion-input [(ngModel)]="email"></ion-input>
  </ion-item>
  <ion-item>
    <ion-label position="floating">Password</ion-label>
    <ion-input [(ngModel)]="password"></ion-input>
  </ion-item>

  <ion-button expand="block" class="ion-margin-vertical" (click)="register()">REGISTER</ion-button>

  <div class="ion-text-center">
    Already have an account? <span routerLink="/login" routerDirection="backward">Sign-in</span>
  </div>
</ion-content>
Now open login.page.ts and put below code
import { Component, OnInit } from '@angular/core';
import { AngularFireAuth } from '@angular/fire/auth';
import { Router } from '@angular/router';
import { AlertController } from '@ionic/angular';

@Component({
  selector: 'app-login',
  templateUrl: './login.page.html',
  styleUrls: ['./login.page.scss'],
})
export class LoginPage implements OnInit {

  email: any;
  password: any;

  constructor(
    private fireauth: AngularFireAuth,
    private router: Router,
    private alertCtrl: AlertController
  ) { }

  ngOnInit() {
  }

  login() {
    this.fireauth.auth.signInWithEmailAndPassword(this.email, this.password)
      .then((res) => {
        if (res.user) {
          // Login Success
          this.router.navigate(['home']);
        }
      }).catch((err) => {
        let msg = err.message;

        this.presentAlert("Error", msg);
      })
  }

  async presentAlert(header, msg) {
    const alert = await this.alertCtrl.create({
      header: header,
      message: msg,
      buttons: ['OK']
    });

    await alert.present();
  }

}
Now open register.page.ts
import { Component, OnInit } from '@angular/core';
import { AngularFireAuth } from '@angular/fire/auth';
import { Router } from '@angular/router';
import { AlertController } from '@ionic/angular';

@Component({
  selector: 'app-register',
  templateUrl: './register.page.html',
  styleUrls: ['./register.page.scss'],
})
export class RegisterPage implements OnInit {

  email: any;
  password: any;

  constructor(
    private fireauth: AngularFireAuth,
    private router: Router,
    private alertCtrl: AlertController
  ) { }

  ngOnInit() {
  }

  register() {
    this.fireauth.auth.createUserWithEmailAndPassword(this.email, this.password)
      .then((res) => {
        if (res.user) {
          // Register Success
          this.router.navigate(['home']);
        }
      }).catch((err) => {
        let msg = err.message;

        this.presentAlert("Error", msg);
      })
  }

  async presentAlert(header, msg) {
    const alert = await this.alertCtrl.create({
      header: header,
      message: msg,
      buttons: ['OK']
    });

    await alert.present();
  }

}
Now open home.page.html
<ion-header [translucent]="true">
  <ion-toolbar>
    <ion-title>
      Home
    </ion-title>
  </ion-toolbar>
</ion-header>

<ion-content class="ion-padding">
  <strong>Welcome</strong>

  <ion-button expand="block" class="ion-margin-vertical" (click)="logout()">LOG OUT</ion-button>
</ion-content>
Now open home.page.ts
import { Component } from '@angular/core';
import { AngularFireAuth } from '@angular/fire/auth';
import { Router } from '@angular/router';
import { AlertController } from '@ionic/angular';

@Component({
  selector: 'app-home',
  templateUrl: 'home.page.html',
  styleUrls: ['home.page.scss'],
})
export class HomePage {

  constructor(
    private fireauth: AngularFireAuth,
    private router: Router,
    private alertCtrl: AlertController
  ) {}

  logout() {
    this.fireauth.auth.signOut()
      .then(() => {
        this.router.navigate(['login']);
      })
      .catch((err) => {
        let msg = err.message;

        this.presentAlert("Failed", msg);
      });
  }

  async presentAlert(header, msg) {
    const alert = await this.alertCtrl.create({
      header: header,
      message: msg,
      buttons: ['OK']
    });

    await alert.present();
  }
}
Now open app-routing.module.ts, made changes like below
import { NgModule } from '@angular/core';
import { PreloadAllModules, RouterModule, Routes } from '@angular/router';

const routes: Routes = [
  { path: '', redirectTo: 'login', pathMatch: 'full' },
  { path: 'home', loadChildren: () => import('./home/home.module').then( m => m.HomePageModule)},
  {
    path: 'login',
    loadChildren: () => import('./login/login.module').then( m => m.LoginPageModule)
  },
  {
    path: 'register',
    loadChildren: () => import('./register/register.module').then( m => m.RegisterPageModule)
  },
];

@NgModule({
  imports: [
    RouterModule.forRoot(routes, { preloadingStrategy: PreloadAllModules })
  ],
  exports: [RouterModule]
})
export class AppRoutingModule { }
Ok now we're done with firebase email sign-in & sign-out, now you can run the app by
ionic serveand check our work, in future article i'll cover other more features of firebase auth, stay tuned. -
thanks bro
-
Superb bro
-
@cody @root thanks bro
-
Great 💪
-
@isuru2014 thanks bro
-
awesome, keep it up
-
ionic firebase DB එකත් ඔනේ
-
@kusalrathna ekatath tutorial ekak hadannm