Lanka Developers Community

    Lanka Developers

    • Register
    • Login
    • Search
    • Categories
    • Recent
    • Tags
    • Popular
    • Users
    • Groups
    • Shop
    1. Home
    2. dev_lak
    • Profile
    • Following 5
    • Followers 28
    • Topics 31
    • Posts 460
    • Best 151
    • Controversial 0
    • Groups 3

    dev_lak

    @dev_lak

    218
    Reputation
    1482
    Profile views
    460
    Posts
    28
    Followers
    5
    Following
    Joined Last Online
    Location Colombo Age 27

    dev_lak Unfollow Follow
    Node.js Game Development blockchain development

    Best posts made by dev_lak

    • Ionic Framework Intro

      0_1547220209312_start-using-ionic-00001.jpg

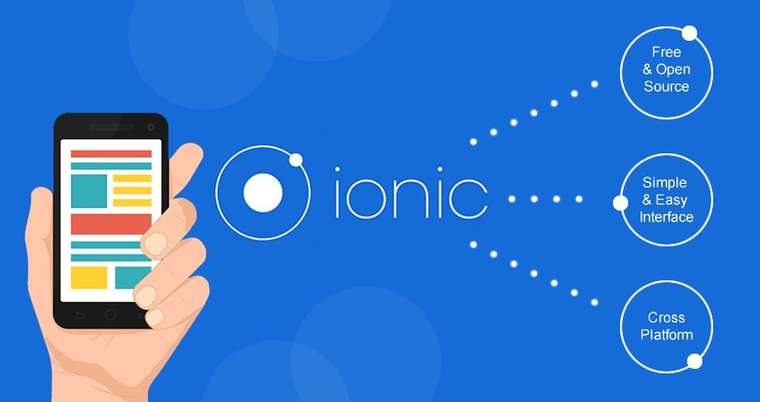
      What is Ionic Framework

      Ionic is a complete open-source SDK for hybrid mobile app development created by Max Lynch, Ben Sperry and Adam Bradley of Drifty Co. in 2013. The original version was released in 2013 and built on top of AngularJS and Apache Cordova. The more recent releases, known as Ionic 3 or simply "Ionic", are built on Angular. Ionic provides tools and services for developing hybrid mobile apps using Web technologies like CSS, HTML5, and Sass. Apps can be built with these Web technologies and then distributed through native app stores to be installed on devices by leveraging Cordova.

      Installing Ionic


      Ionic apps are created and developed primarily through the Ionic command line utility (the “CLI”), and use Cordova to build/deploy as a native app. This means we need to install a few utilities to get developing.

      Installing Node and NPM

      The quickest way to get Node and NPM installed on your machine is through the NodeJS installer. After installing open a terminal and run npm --version and node --version to verify you have everything installed correctly.

      Installing Ionic CLI

      Run below command on your terminal

      $ npm install -g ionic cordova

      Note: The -g means this is a global install, so for Windows you will need to open an Admin command prompt. For Mac/Linux, you might need to run the command with sudo.
      

      Creating Ionic App


      To create a blank app run below command

      ionic start helloWorld blank

      • start will tell the CLI create a new app.
      • helloWorld is the App name.
      • blank is starter template

      Along with the blank template, Ionic also provides the following official templates:

      tabs : a simple 3 tab layout
      sidemenu: a layout with a swipable menu on the side
      blank: a bare starter with a single page
      super: starter project with over 14 ready to use page designs
      tutorial: a guided starter project

      If you don’t specify a template at the start, you will be prompted to pick one.

      Running our App


      To run your app, cd into the directory that was created.

      $ cd helloWorld
      $ ionic serve

      In the next article i'll go over the project structure created by the ionic start command

      References


      Official Ionic Framework Docs

      posted in Hybrid App Development
      dev_lak
      dev_lak
    • RE: How to write regex with javascript

      try, /[a-zA-Z]{8}[_]{1}[0-9]{7}$/g

      posted in Web Development
      dev_lak
      dev_lak
    • React JS Intro

      0_1545988991425_reac.png

      What is React JS

      • React is a JavaScript library for building user interfaces.

      React Components

      • Everything in React is a component, and these usually take the form of JavaScript classes. You create a component by extending upon the React-Component class.
        Eg:

        class MyComponent extends React.Component {
            render() {
                return <h1>Hello world!</h1>;
            }
        }
        
      • You then define the methods for the component. In our example, we only have render() method.

      • Inside render() you’ll return a description of what you want React to draw on the page. In the case above, we simply want it to display an h1 tag with the text Hello world! inside it.

      Props and States

      • There are two types of data in React: props and state.

      • The key difference is that state is private and can be changed from within the component itself. Props are external, and not controlled by the component itself. It’s passed down from components higher up the hierarchy, who also control the data.

      • The difference between the two is a bit tricky to understand in the beginning, so don’t worry if you find it a bit confusing. i'll show you how to work with props and states in the next tutorial.

      Setting Up

      • First create a .html file

      • Then import react like below

        <!-- ... other HTML ... -->
        
          <!-- Load React. -->
          <!-- Note: when deploying, replace "development.js" with "production.min.js". -->
          <script src="https://unpkg.com/react@16/umd/react.development.js" crossorigin>    </script>
          <script src="https://unpkg.com/react-dom@16/umd/react-dom.development.js" crossorigin></script>
        
        </body>
        

      Add a DOM Container to the HTML

      • Add an empty <div> tag to mark the spot where you want to display something with React. For example:

        <!-- ... existing HTML ... -->
        
        <div id="save_button_container"></div>
        
        <!-- ... existing HTML ... -->
        
      • We gave this <div> a unique id HTML attribute. This will allow us to find it from the JavaScript code later and display a React component inside of it.

      Creating a React Component

      • Create a file called save_button.js next to your HTML page.

      • Add below code to save_button.js file

        'use strict';
        
        const e = React.createElement;
        
        class SaveButton extends React.Component {
          constructor(props) {
            super(props);
            this.state = { saved: false };
          }
        
          render() {
            if (this.state.liked) {
              return 'You saved this.';
            }
        
            return e(
              'button',
              { onClick: () => this.setState({ saved: true }) },
              'Save'
            );
          }
        }
        
        //These two lines of code find the <div> we added to our HTML in the last step, and then display our “Save” button React component inside of it.
        const domContainer = document.querySelector('#save_button_container');
        ReactDOM.render(e(SaveButton), domContainer);
        

      Loading our React Component

      <!-- ... other HTML ... -->
      
        <!-- Load our React component. -->
        <script src="save_button.js"></script>
      
      </body>
      
      • Open the .html file you create using your favourite browser and you will see something like below:

      0_1545987958832_d79088ee-6b1c-4907-a2d8-1bdf0470a236-image.png

      Full Example

      • index.html

        <html>
        <head>
            <title>React App</title>
        </head>
            <body>
                <h1>Welcome to my React App</h1>
                <div id="save_button_container"></div>
        
                <!-- Load React. -->
                <!-- Note: when deploying, replace "development.js" with "production.min.js". -->
                <script src="https://unpkg.com/react@16/umd/react.development.js" crossorigin></script>
                <script src="https://unpkg.com/react-dom@16/umd/react-dom.development.js" crossorigin></script>
        
                <!-- Load our React component. -->
                <script src="save_button.js"></script>
            </body>
        </html>
        
      • save_button.js

        'use strict';
         
        const e = React.createElement;
         
        class SaveButton extends React.Component {
          constructor(props) {
            super(props);
            this.state = { saved: false };
          }
         
          render() {
            if (this.state.liked) {
              return 'You saved this.';
            }
         
            return e(
              'button',
              { onClick: () => this.setState({ saved: true }) },
              'Save'
            );
          }
        }
         
        //These two lines of code find the <div> we added to our HTML in the last step, and then display our “Save” button React component inside of it.
        const domContainer = document.querySelector('#save_button_container');
        ReactDOM.render(e(SaveButton), domContainer);
        

      Thanks for reading, in the next tutorial i'll talk about

      • Props and States
      posted in Front-End Development
      dev_lak
      dev_lak
    • Firebase Cloud function to send emails via SendGrid

      In this post i'm showing you how to send emails via firebase cloud functions by SendGrid. SendGrid is a cloud based email service it has free tier which will help you to begin. Also we have to enable firebase billing to work this correctly, because firebase free plan only allow google services for outbound networking.

      For this tutorial i'm assuming you have installed firebase sdk and log into your firebase account.

      Setting up things

      1. Open terminal & run firebase init to initilize firebase functions
      2. We need two packages for this, add them via npm
        1. npm install @sendgrid/mail
        2. npm install cors
      3. Now open index.js and put below code.
      const functions = require('firebase-functions');
      
      const admin = require('firebase-admin');
      admin.initializeApp();
      
      const SENDGRID_API_KEY = "PUT_YOUR_SENDGRID_API_KEY";
      
      const sgMail = require('@sendgrid/mail');
      const cors = require("cors")({
        origin: true
      });
      
      exports.sendEmail = functions.https.onRequest((req, res) => {
      	return cors(req, res, () => {
        	const msg = {
            to: req.body.email,
            from: '[email protected]',
            subject:  'SUBJECT',
            templateId: 'd-02d153b9f48f490bb73bfcc6ad92d892', //SendGrid Template ID
            // SendGrid Template Variables
            dynamic_template_data: {
              name: req.body.name,
              event_name: req.body.event,
              date: req.body.date
            }
          };
          
          sgMail.send(msg).then(res => {
            res.send({
              success: true,
              message: res
            });
          }).catch(err => {
            res.send({
              success: false,
              error: err
            });
          });
        });
      });
      
      1. Now deploy our function by running firebase deploy --only functions

      NOTE - To work this correctly, you must enable billing on your firebase account

      posted in Programming
      dev_lak
      dev_lak
    • Flutter Ecommerce App UI

      thumbnail.jpg

      Flutter Ecommerce App UI

      Watch the full tutorial - https://youtu.be/bCAOaP5O2UY

      Don't forget to subscribe the channel!

      posted in Flutter
      dev_lak
      dev_lak
    • Flutter Spotify App Redesigned

      thumb (1).png

      Redesigning Spotify Home Page Using Flutter

      Watch full video on Youtube :point_right: https://youtu.be/HwDDF9e_vJQ

      Link to Source Code can be found on YouTube Video description.

      Give me support by 👇 👇
      ✅ Subscribe ✅ Share ✅ Comment & Stay Connected!

      posted in Mobile Application Development
      dev_lak
      dev_lak
    • Basic SEO for Web Developers Part 1

      Important HTML Elements

      1. Title Tag

      <head> 
          <title>Page Title</title>
      </head>
      

      Best Practices

      • Less than 512px (50-70 characters)
      • Important keywords near the beginning
      • Each title should be unique

      2. Meta Description Tag

      <head>
          <meta name="description"content="This is an example.">
      </head>
      

      Best Practices

      • Best under 155 characters
      • Each description should be unique
      • Well written descriptions influenceclick-through rate

      3. Images

      <img src="img/keyword.jpg" alt="keyword" width="100" height="100">
      

      4. Hyperlinks

      1. Text Link

        <a href="https://www.example.com/webpage.html">Keyword in Anchor Text</a>
        
      2. NoFollowed Link

        <a href="https://www.example.com/webpage.html" rel="nofollow">Keyword in Anchor Text</a>
        
      3. Image Link

        <a href="https://www.example.com/webpage.html"><img src="/img/keyword.jpg" alt="keyword" width="100" height="100"></a>
        

      Best Practices

      • Preference: HTML links over JavaScript
      • Use "nofollow" for paid links and un-trusted content
      • For image links, the alt attribute serves as anchor text

      5. HTTP Status Codes

      • 200OK/Success
      • 301Permanent Redirect
      • 302Temporary Redirect
      • 404Not Found
      • 410Gone (permanently removed)
      • 500Server Error
      • 503Unavailable (retry later)

      6. Webmaster Tools

      1. Google Webmaster Tools - https://www.google.com/webmasters/tools/home
      2. Bing Webmaster Tools - http://www.bing.com/toolbox/webmaster/
      3. Yandex Webmaster - https://webmaster.yandex.com/

      7. Canonicalization

      Common Duplicate Homepage URLs

      • https://www.example.com
      • https://example.com
      • https://www.example.com/index.html
      • https://example.com/index.html
      • https://example.com/index.html&sessid=123

      Canonicalized URL Best Practices

      • Preferred URL = https://example.com/
      • Place the following in <head> section to indicate preferred URL:
      • <link href="https://example.com/" rel="canonical" />

      8. URL Best Practices
      0_1543928143776_5248a308-2daf-4ec2-80f4-5e474cb50c33-image.png

      SEO Tips for URLs

      • Choose shorter, human-readable URLs with descriptive keywords
      • Exclude dynamic parameters when possible (see Canonicalization and Pagination)
      • When possible, place content on the same subdomain to preserve authority
      • Recommended: https://example.com/blog
      • Less Ideal: https://blog.example.com

      I'll post next part asap.
      Thank you all for your time in reading this!

      posted in Web Development
      dev_lak
      dev_lak
    • AngularJS Guide Part 1 - English

      0_1545405228808_angularjs.jpg

      Angular JS is a client side MVC/MVVM Framework, this is created by google so most of developers adopted to angular js. This is very popular for single page web applications and also we can do lot of things using angular js. Ionic framework is best example that showing power of angular which is used to make Hybrid Mobile Applications using HTML, CSS and Javascripts only.

      To install the Angular JS we want Node JS on our computer, and we use Angular CLI to create, test, build and deploy our angular app.

      Installing Node JS


      www.nodejs.org go to this website and download right package match to your OS. You can find out instructions on that page

      Installing Angular


      After installing node js we need to install Angular CLI, to install that open your terminal and run

      npm install -g @angular/cli
      

      Creating an Angular App


      After installing Angular CLI, navigate to where you want to create angular project and then run following command in the terminal

      ng new my-app //my-app is your project name
      

      When you run this command it will ask you information about your app, for now just press enter, we can change these info later

      Running our Angular App


      Navigate to your app directory

      cd my-app
      

      After you navigating to app folder you can run your app using ng-serve command. When you run this command it will start a local server and when you made a change it will automatically reloads the app(auto reloading) this is a very useful feature.

      ng serve --open
      

      When you run above command it will automatically open the app using default web browser(http://localhost:4200/), if not try rerunning the command. On successful execution you can see like below

      0_1545407172540_1545302907665-app-works.png

      On the next step i'll show you how to edit our app. If you have any question just ask on lankadevelopers.com our members will help you.

      Originally posted by @ciaompe
      This is translated cause of most peoples are requesting an english version.

      Source : https://angular.io/guide/quickstart

      posted in Front-End Development
      dev_lak
      dev_lak
    • RE: App for Lanka Developers Community

      we are developing an API library for lankadevelopers once done we will create a public repository, then you can contribute to our repository. We are planing to create app using React Native. Thank you for your suggesting such a great idea.

      Made with :hearts: in Sri Lanka

      posted in General Discussion
      dev_lak
      dev_lak
    • NPM Package to Generate Keystores

      Hello guys,

      I just published a NPM package to create keystore files simply for sign apk's, to generate a keystore, generally we use large command like below,

      keytool -genkey -v -keystore my-release-key.keystore -alias alias_name -keyalg RSA -keysize 2048 -validity 10000

      within this package we just run simple command with two arguments like below,

      kg key generate

      It's pretty simple, star my github repo if you're love this package.
      Installation guide can found on npm package page and github repo.

      https://www.npmjs.com/package/keystore-generator

      https://github.com/codingwithmrdev/keystore-generator

      Thank you.

      posted in Mobile Application Development
      dev_lak
      dev_lak

    Latest posts made by dev_lak

    • RE: Android game developed using Unity 3D

      @root I will try to make tutorial in my free time

      posted in Game Development
      dev_lak
      dev_lak
    • Android game developed using Unity 3D

      post1.jpg

      Cube Runner is a Hypercasual game, player have to move the cube and avoid hitting on walls. All scores are recorded on Leaderboard, Just download and run endlessly.

      Google Play Link - [https://play.google.com/store/apps/details?id=com.codecraftapps.cuberunner](Click Here)

      posted in Game Development
      dev_lak
      dev_lak
    • RE: Who wants to talk about Crypto || NFT

      @ciaompe good idea bro

      posted in Crypto
      dev_lak
      dev_lak
    • RE: Looking for Associate SE position in Flutter

      @ciaompe thanks bro

      posted in Mobile Application Development
      dev_lak
      dev_lak
    • RE: Who wants to talk about Crypto || NFT

      We would like to talk about nft bro

      posted in Crypto
      dev_lak
      dev_lak
    • RE: Flutter notifications

      Good job

      posted in Mobile Application Development
      dev_lak
      dev_lak
    • RE: Flutter Ecommerce App UI

      @lahirunc thanks

      posted in Flutter
      dev_lak
      dev_lak
    • RE: Flutter Ecommerce App UI

      @root thanks bro

      posted in Flutter
      dev_lak
      dev_lak
    • Flutter Ecommerce App UI

      thumbnail.jpg

      Flutter Ecommerce App UI

      Watch the full tutorial - https://youtu.be/bCAOaP5O2UY

      Don't forget to subscribe the channel!

      posted in Flutter
      dev_lak
      dev_lak
    • Need Flutter Developer & Node JS Developer

      We need Experienced 1 Flutter Developer & 1 Node JS developer for a freelance project.

      • Project Time 2Months (Deadline is Fixed cannot extend)
      • Good experience in Flutter, Provider State Management Required
      • Rest API developing skills required for NodeJS Position
      • AWS S3, Aroga Implementation

      If you're interested drop a message to whats app - 077 55 80 646

      Thanks.

      posted in Job Portal
      dev_lak
      dev_lak