React JS Intro
-

What is React JS
- React is a JavaScript library for building user interfaces.
React Components
-
Everything in React is a component, and these usually take the form of JavaScript classes. You create a component by extending upon the React-Component class.
Eg:class MyComponent extends React.Component { render() { return <h1>Hello world!</h1>; } } -
You then define the methods for the component. In our example, we only have
render()method. -
Inside
render()you’ll return a description of what you want React to draw on the page. In the case above, we simply want it to display an h1 tag with the text Hello world! inside it.
Props and States
-
There are two types of data in React: props and state.
-
The key difference is that state is private and can be changed from within the component itself. Props are external, and not controlled by the component itself. It’s passed down from components higher up the hierarchy, who also control the data.
-
The difference between the two is a bit tricky to understand in the beginning, so don’t worry if you find it a bit confusing. i'll show you how to work with props and states in the next tutorial.
Setting Up
-
First create a
.htmlfile -
Then import react like below
<!-- ... other HTML ... -->

  <!-- Load React. -->
  <!-- Note: when deploying, replace "development.js" with "production.min.js". -->
  <script src="https://unpkg.com/react@16/umd/react.development.js" crossorigin>    </script>
  <script src="https://unpkg.com/react-dom@16/umd/react-dom.development.js" crossorigin></script>

</body>
Add a DOM Container to the HTML
-
Add an empty
<div>tag to mark the spot where you want to display something with React. For example:<!-- ... existing HTML ... --> <div id="save_button_container"></div> <!-- ... existing HTML ... --> -
We gave this
<div>a unique id HTML attribute. This will allow us to find it from the JavaScript code later and display a React component inside of it.
Creating a React Component
-
Create a file called
save_button.jsnext to your HTML page. -
Add below code to
save_button.jsfile'use strict'; const e = React.createElement; class SaveButton extends React.Component { constructor(props) { super(props); this.state = { saved: false }; } render() { if (this.state.liked) { return 'You saved this.'; } return e( 'button', { onClick: () => this.setState({ saved: true }) }, 'Save' ); } } //These two lines of code find the <div> we added to our HTML in the last step, and then display our “Save” button React component inside of it. const domContainer = document.querySelector('#save_button_container'); ReactDOM.render(e(SaveButton), domContainer);
Loading our React Component
<!-- ... other HTML ... --> <!-- Load our React component. --> <script src="save_button.js"></script> </body>- Open the
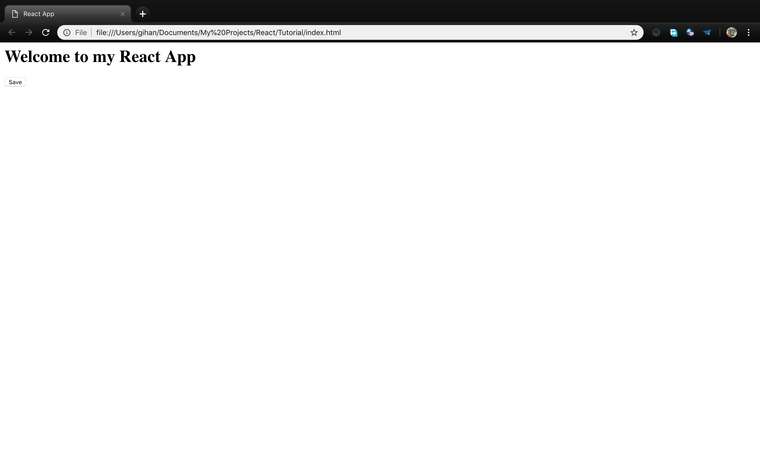
.htmlfile you create using your favourite browser and you will see something like below:

Full Example
-
index.html<html> <head> <title>React App</title> </head> <body> <h1>Welcome to my React App</h1> <div id="save_button_container"></div> <!-- Load React. --> <!-- Note: when deploying, replace "development.js" with "production.min.js". --> <script src="https://unpkg.com/react@16/umd/react.development.js" crossorigin></script> <script src="https://unpkg.com/react-dom@16/umd/react-dom.development.js" crossorigin></script> <!-- Load our React component. --> <script src="save_button.js"></script> </body> </html> -
save_button.js'use strict'; const e = React.createElement; class SaveButton extends React.Component { constructor(props) { super(props); this.state = { saved: false }; } render() { if (this.state.liked) { return 'You saved this.'; } return e( 'button', { onClick: () => this.setState({ saved: true }) }, 'Save' ); } } //These two lines of code find the <div> we added to our HTML in the last step, and then display our “Save” button React component inside of it. const domContainer = document.querySelector('#save_button_container'); ReactDOM.render(e(SaveButton), domContainer);
Thanks for reading, in the next tutorial i'll talk about
- Props and States
-
Thanks @dev_lak
-
Good Explanation, react is the future of web frontend
-
Nice article... thanks bro
-
React <3
-
Thanx for this. ✌️
-
@dileepanipun welcome machn..
-
Thank you