Upload Images and save them in a database( Angular 8 + Spring boot + Mysql )
-
This article is all about uploading an image through your angular project , sending it into the backend and saving it in a database.
Not only that, the way how to query the database and viewing back the image in the frontend is also explained here.
[As this article is written for explaining the simple mechanism of uploading an image, web page decorations are not done, only the relevant parts are designed for explanation.]-
The frontend used is Angular 8.
-
The backend use is Spring boot
-
The database used is Mysql
Please note that,
Some basic knowledge about angular ,spring boot and mysql is essential.( because the way of project creating in those frameworks is not discussed as it makes this article lengthier.)
As IDEs , VS code is used for Angular and IntelliJ IDE is used for Spring boot.1.0 Frontend
First , create an angular project . ( See how )
We need HttpClientModule for dealing with the backend. So, We
have to import that module to the project.
Go to src/app/app.module.ts-
Add the following code lines in app.module.ts file as in the image
below.import { HttpClientModule } from '@angular/common/http';
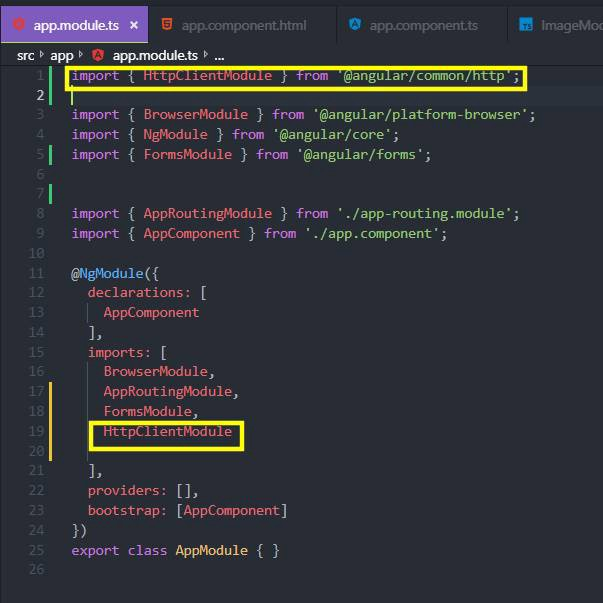
and, declare the module in imports array.- Go to app.component.html file and add the following code.
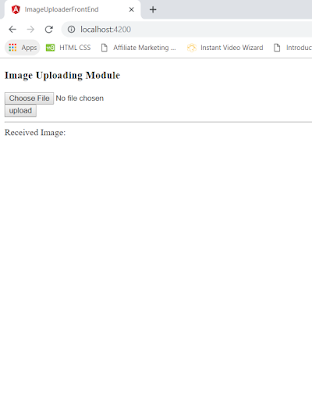
<h3>Image Uploading Module</h3>
<div>
<input type="file" (change)="onFileChanged($event)">
<img [src]="imgURL" height="200" *ngIf="imgURL">
</div>

<!-- upload image  -->

<input type="button" (click)="onUpload()" value="upload">
<hr />
Received Image:
{{ receivedImageData['pic'] | json}}

<img [src]="convertedImage" >
The view will be like this.
In this code,
(change)="onFileChanged($event)
is used to listen to any file choosing event and trigger the onFileChange(event) method in .ts file.imgURL, convertedImage are properties in the .ts file.
*Go to src/app/app.component.html file and write the following code snippets in it.

Import HttpClient class from '@angular/common/http' .
And, inject it via the constructor of the class as in the image.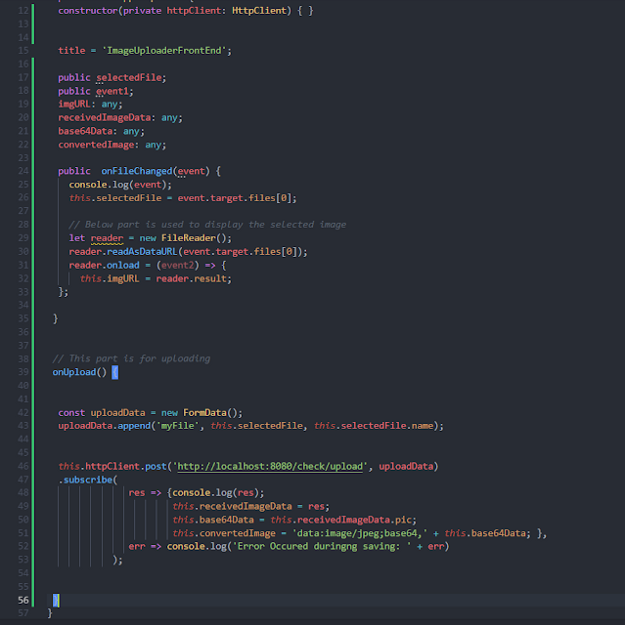
Write and complete your app.component.ts file as shown in the images.As the backend is running on local port 8080, posting url is also given as preferred.
We send the image to the backend as a FormData,so that the backend can retrieve it as a multipart file.
By,subscribing to the post method ,we have retrieved the returned image data by the backend and assigned them to the properties which are used to render in the view.***You may find the code snippets here.
app.component.ts
app.component.html
app.module.ts
2.0 Spring Boot Backend
Now,let's move to the backend part.
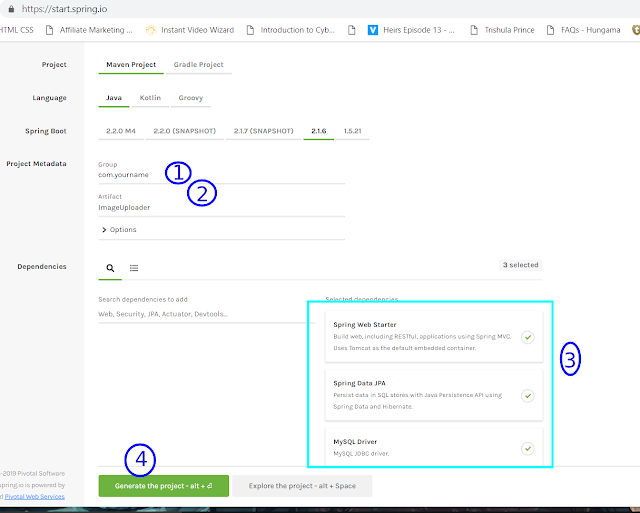
First , create a maven project through Spring Initializer website.
- Give a group name to the project
- Give a artifact nae to the project
3.Add three dependencies given[Spring Web Starter, Spring Data JPA, MySQL Driver, Lombok] - Genereate the project and download the zipped file of the project.
Extract the zipped file .
Open your IDE(Here,IntelliJ IDE is used).
Open the extracted project by selecting the pom.xml file, through the IDE.This is the file structure in the project I created.
A controller class as TestController.java [Get code]
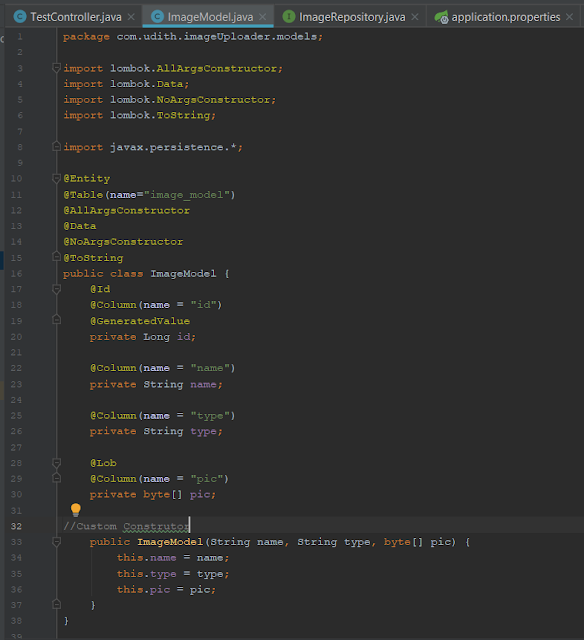
A model class as ImageModel.java [Get Code]
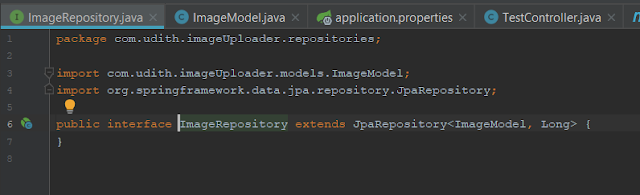
A repository interface as ImageRepository.java [Get code]**ImageModel.java
**ImageRepository.java
**TestController.java
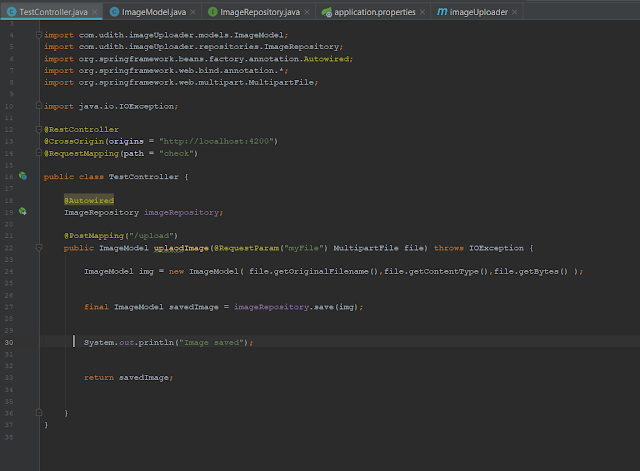
Here , in the controller file, image is captured in MulipartFile format . From the frontend, the image data is sent as a form data by appending the data to the request parameter named "myFile" .
*You can read about MultipartFile interface here.
*You need to edit the application.properties file , to connect to the mysql database according to your PC settings. (Read how)
Enjoy!
-
-
good post thanks
-
wow amazing
-
superb bro