පහසුන්වෙන්ම ඔබෙ Angular Application එක නොමිලෙ Netlify server එකෙ deploy කර ගමු. (Simple English)
-
This article is all about how you can deploy your Angular application securely on Netlify server . This is a free place for you to deploy your application.First you need to have a Netlify Accout (Create if not) and a GitHub repo of your project.
( I assume that you already have a github repo of your Angular project.)
I teach you the way with a sample project I created just for fun.Let’s begin
Configuring Netlify
1. First go to your Netlify account. There you can see a button “New site from Git” (Fig 1.1). Click on it.
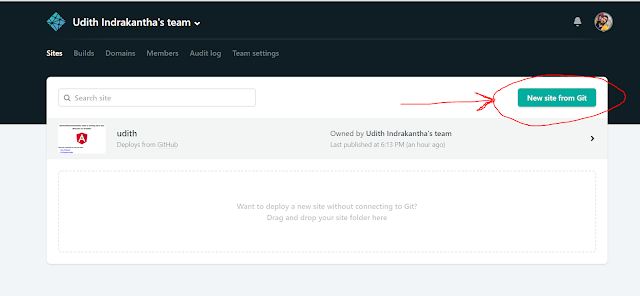
Fig 1.12. Then select the repository site. I here select GitHub.(You can select the site where your project is.)
When selected, you are redirected to authorize the access from netlify and there you can select the repository that you need to deploy.3. Select the repository again and go to step 3. (Fig 1.2)

Fig 1.2Here in this page, you have to fill some information. (you can change these later too)
You can specify which branch needs to be deployed.
For Build Command , give ng build — prod
For Publish directory , give dist/<your project name>
(You can find your correct project name at the end of angular.json file of your project. Ex: dist/my-blogger-web as in Fig(1.3))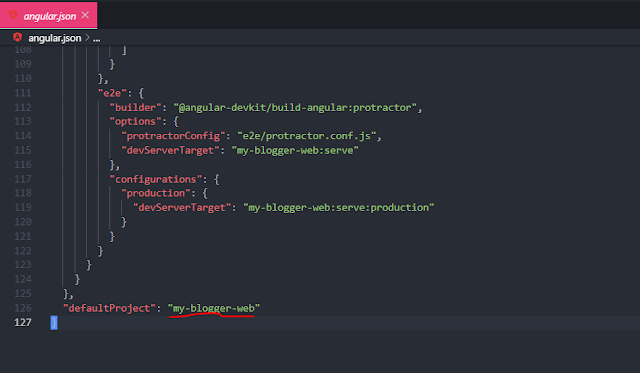
Fig 1.3If all set. Click the button “Deploy site”. You will be directed to something like this in Fig 1.4.
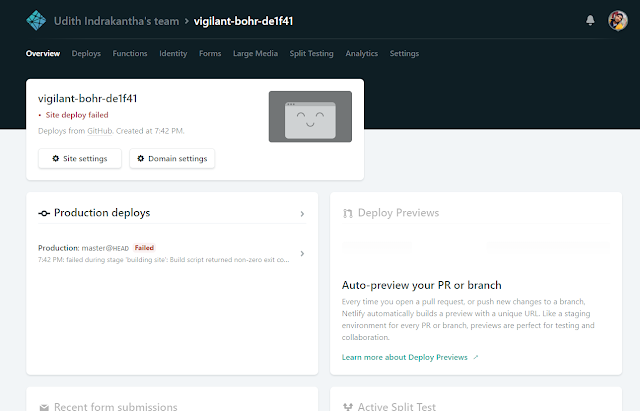
Fig 1.44. Next, go to Settings tab and copy the API ID and save it somewhere because we are gonna need it later. (Fig 1.5)
[Here, you can change your site name also.]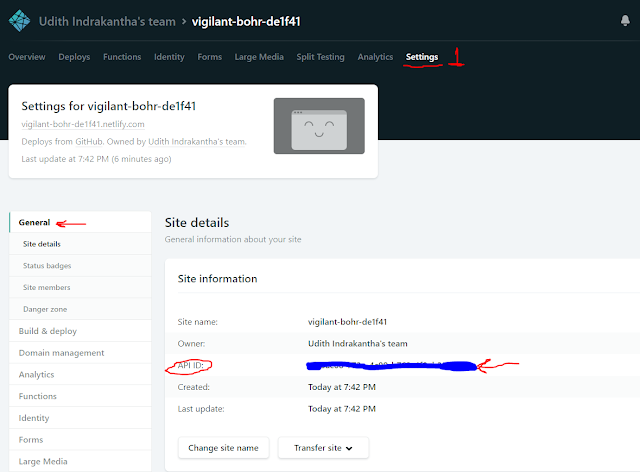
Fig 1.55. We need to find a Personal Access Token key .
Click on Avatar picture of your profile on right top corner, select User settings,
Select Applications from the menu,
Under Personal access tokens, click New access token button .
(Fig 1.6, Fig 1.7)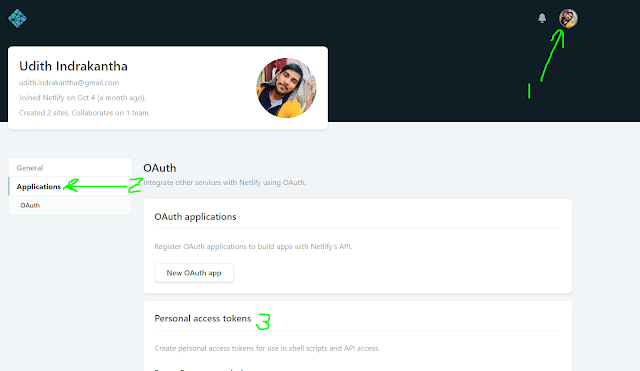
Fig 1.6
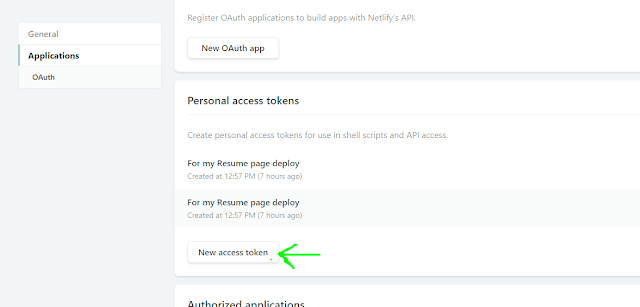
Fig 1.7Give a simple description for the token so that you can identify why this token is used, when you check tokens sometimes later.
Click the button to Generate a token. Copy and paste that token somewhere to use it later. Then click Done! at last.
Configuration in Angular project
6. Open the command window inside your Angular project’s root folder.
and run this command
ng add @netlify-builder/deploy**There you are asked to enter API ID: you can enter it from where you copied and saved it earlier.
** You are asked next to enter personal Acccess token which you generated earlier . Please, do not enter it here.Just press enter and skip it.( Because these details are entered in your angular.json file which can be tracked in your github repo easily so that outsider can use your API ID and access token to get access to your site. see Fig 1.8 )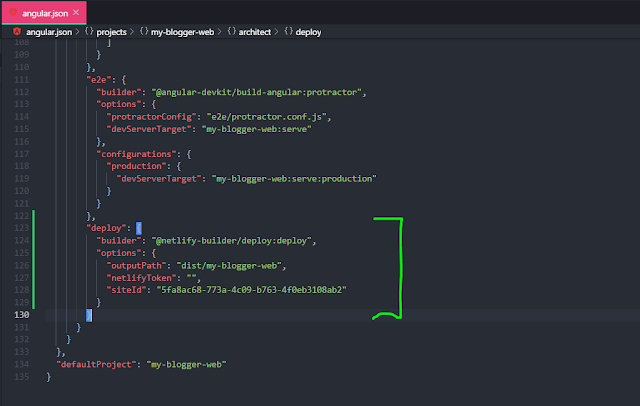
Fig 1.87. Next you have to set up the access token key as an environment variable of your computer.
Right click on This PC icon on desktop of you computer ==> Properties ==> Advanced system settings ==> Advanced tab ==>Environment Variables ==> User Variables
Under User variables , you have to enter a new variable, Variable Name as NETLIFY_TOKEN and Variable value as the access token key generated earlier and saved for later use by you. see Fig 1.9
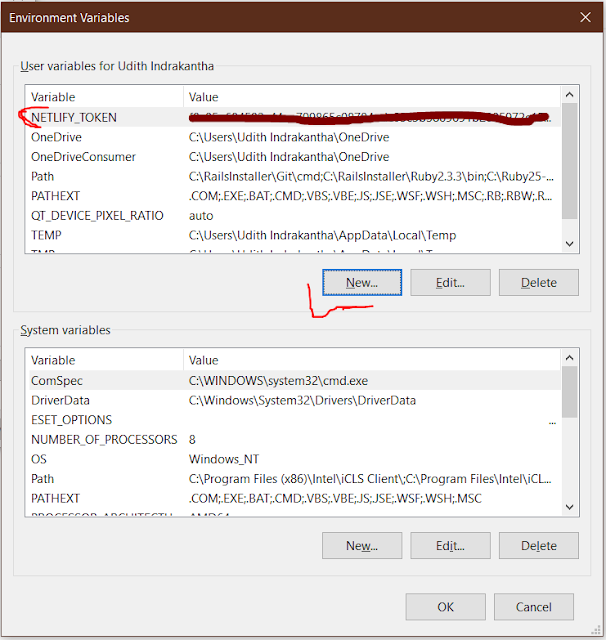
Fig 1.99. Next you have to run
ng run <your project name>:deployPlz, give your project name when running the above command.(See ,no space when typing the colon : )
Ex: ng run my-blogger-web:deploy[For Angular vCLI 8.3.0 and above, just run ng deploy instead]
This creates a folder dist/<Your project name> which you gave as the Publish directory for netlify site.
10. Next part is, open your .gitignore file of your project and delete the line with /dist to track dist folder to be pushed to gitHub.
At last commit and push.
Here you go, go to your netlify site, and Click Trigger Deploy button to deploy. You can change ‘deploy settings’ there if you want.
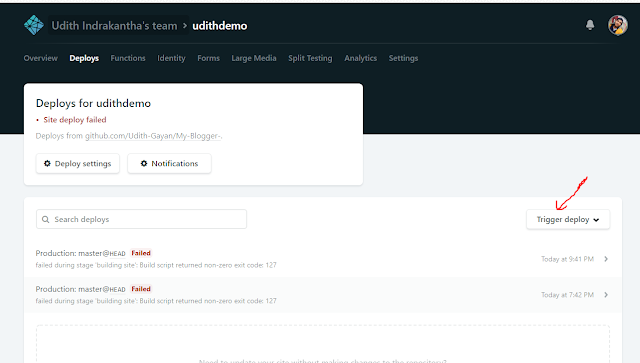
All done!
Your site is available at https://<your site name>.netlify.com
ex: https://udithdemo.netlify.com
Thank you.
-
awesome bro, nelify is a great option for serverless technology, please do a article for heroku, that is all also free
-
@root Thanks bro. I'll upload the article on hosting on heroku soon. I just selected Netlify as first one because I just like that word "Netlify" more than "heroku". By the way, if you find any mistakes in my article, plz don't hesitate to let me know.
-
patta broo
-
awesome bro...
-
Keep it up, good luck